
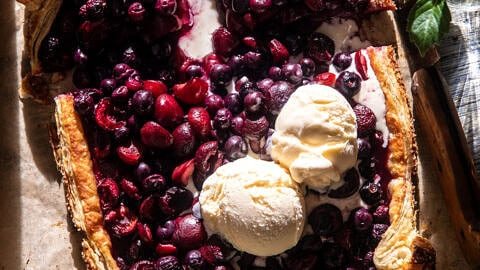
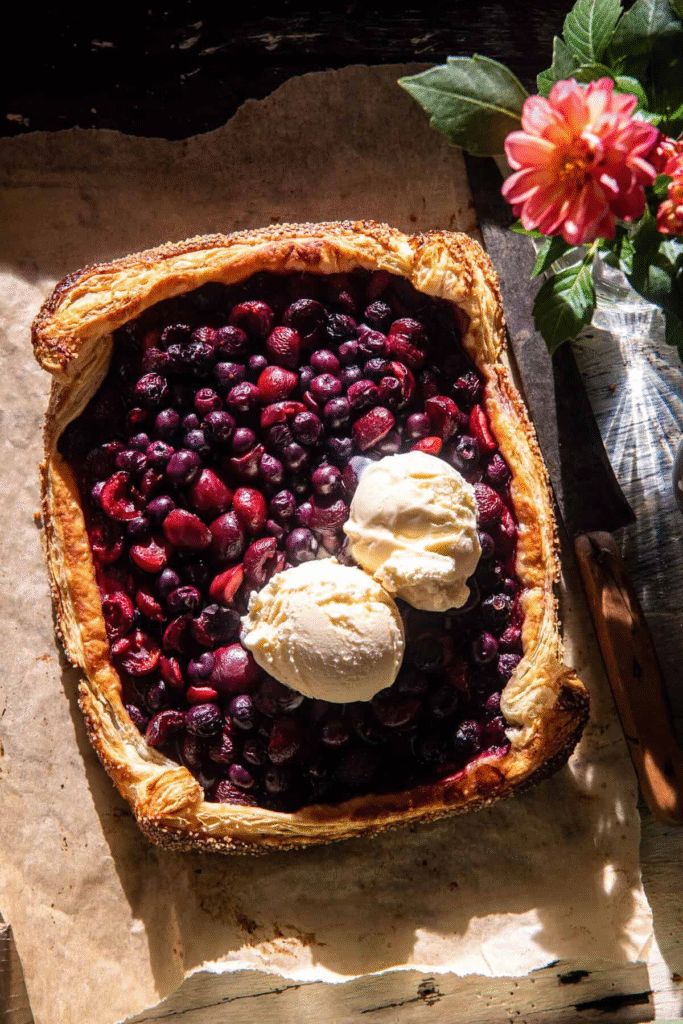
This Easy Blueberry Cherry Galette is a summertime treat that’s bursting with fresh summer cherries and blueberries, sweetened with honey, and made using flakey, buttery puff pastry. Serve with a scoop of vanilla ice cream and flaked sea salt…a delicious summer tart to kick off the season!
When life hands you a bucket of the sweetest California cherries, you do two things. First, you eat them by the fistfuls because, wow, the first cherries of the season are always so delicious.
Second, when your stomach begins to hurt from eating too many cherries at once, you get smart and bake them all into the sweetest tart. And that’s exactly what I did. I still have some cherries left over, but that’s okay. I’m packing them up and bringing them with me to LA. They’re too delicious to leave behind!
And so is this galette, I’m so excited to share the recipe with you all. I know you’ll be making this all summer long!

My cherries came from Peaches LA. They grow the sweetest peaches and early-season California cherries. I love both and will always choose their produce over others. Their peaches have never failed to be outrageously delicious, and the cherries are no different! And no, this post is not sponsored, I just truly love their produce!
The second I opened the box of the first batch of cherries, I knew I wanted to bake with them. I have so many ideas, but a simple tart sounded like the perfect recipe to kick off summer this weekend – and celebrate Father’s Day, too!
This takes no effort to make!

Step 1: Prep Your Pastry
Start with a sheet of store-bought puff pastry (because easy is best!). Let it thaw just enough so it’s workable but still cold—this keeps it nice and flaky. Roll it out slightly on a parchment-lined baking sheet. No need to be perfect—galettes are meant to look rustic!
Step 2: Toss the Fruit
In a bowl, gently mix together pitted cherries, fresh blueberries, a drizzle of honey (or sugar if you prefer), a squeeze of lemon juice, and a tiny pinch of salt. Let it sit for 5 minutes so the juices start to mingle.
Step 3: Fill & Fold
Pile the fruit mixture right in the center of your pastry, leaving about 2 inches of dough around the edges. Fold the edges up and over the fruit, pleating as you go—don’t stress about making it neat! The more imperfect, the more charming it looks.
Step 4: Bake to Golden Perfection
Brush the pastry with an egg wash (or cream) for that golden shine, then pop it in a preheated 400°F (200°C) oven. Bake for 25-30 minutes until the crust is puffed and deeply golden, and the fruit is bubbly.
Step 5: Serve & Devour
Let it cool just enough so you don’t burn your tongue, then top with vanilla ice cream and a flurry of flaky sea salt. The contrast of warm, juicy fruit with cold, creamy ice cream? Chef’s kiss.
Pro Tips:
- No leaking! If your fruit is extra juicy, sprinkle a little cornstarch or flour under the fruit layer before baking.
- Make it ahead: Assemble the galette, freeze it unbaked, then bake straight from frozen (add 5-10 extra minutes).
- Swap the fruit: Peaches, raspberries, or blackberries would all be delicious here too!